

How To Draw A Field In Adobe Photoshop
Acquire the basics of drawing shapes using the shape tools in Photoshop! Covers the geometric shape tools which include the Rectangle, Ellipse, Triangle, Polygon and Line Tools. Updated for Photoshop 2022.
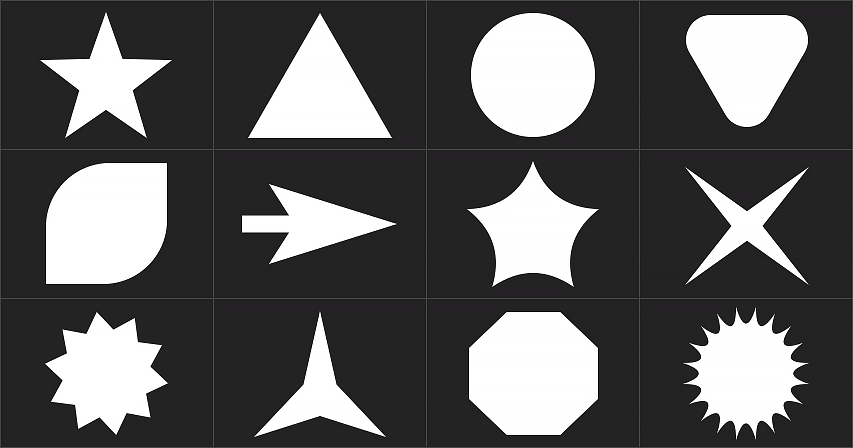
In this tutorial, I evidence you the basics of how to draw shapes using the shape tools in Photoshop. Specifically, we'll await at how to use the geometric shape tools, which are the Rectangle Tool, the Ellipse Tool, the Triangle Tool, the Polygon Tool, and the Line Tool. Photoshop also includes a Custom Shape Tool for drawing more ellaborate pre-made shapes. But because the Custom Shape Tool behaves differently than the geometric shape tools, I'll comprehend it in a separate tutorial.
Adobe has made quite a few changes to the shape tools in recent versions of Photoshop. Then to follow along, you'll want to exist using Photoshop 2022 or later on.
Let's get started!
Setting up the certificate
Yous can follow along with me past creating a new Photoshop certificate. To create one from the Dwelling house Screen, click the New file button.
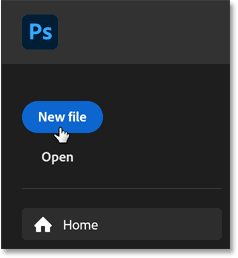
Clicking New file
on the Dwelling Screen.
Or if you're on Photoshop's main interface, become upwardly to the File menu and choose New.
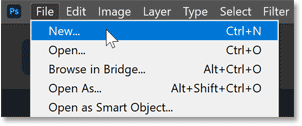
Going to File > New in the Menu Bar.
Then in the New Certificate dialog box, choose the Default Photoshop Size preset and click Create.
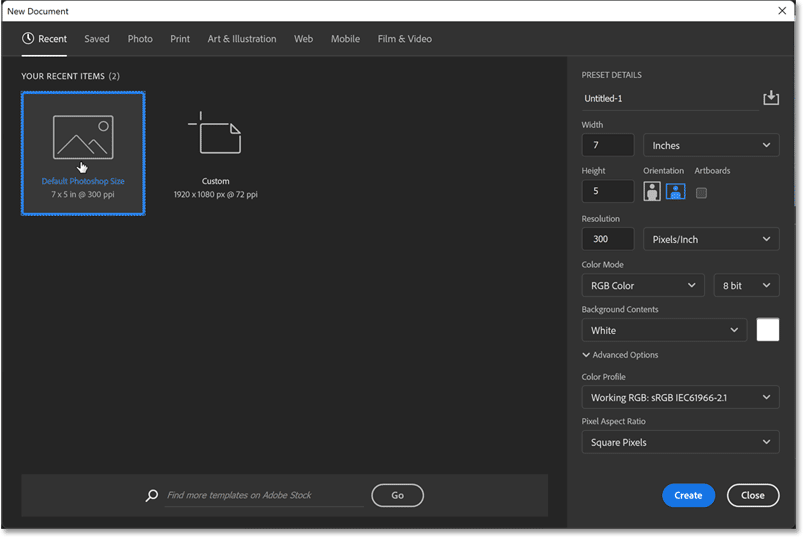
Creating a new document at the default size.
The new certificate appears, ready for us to draw some shapes.
The new Photoshop certificate.
Where do I find Photoshop's shape tools?
The shape tools in Photoshop are all constitute in the toolbar, nested together in the aforementioned spot. By default, the Rectangle Tool is the tool that's visible.
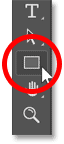
The Rectangle Tool'due south icon in the toolbar.
Click and hold on the Rectangle Tool's icon to open a fly-out menu showing the other shape tools hiding behind it. We'll look at each tool as we go along. For at present, select the Rectangle Tool.
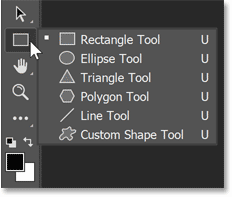
Photoshop'due south shape tools.
The shape tool options in the Options Bar
The options for the active shape tool appear in the Options Bar. And nearly of the options are the same no thing which shape tool is selected. And so let's look at these options from left to right.
Resetting the shape tool to its default settings
The tool icon on the far left of the Options Bar tells us which tool is active. Only it'south also how we reset the tool to its default settings. To reset information technology, right-click (Win) / Control-click (Mac) on the tool icon.
Correct-click (Win) / Command-click (Mac) on the tool icon.
Then choose Reset Tool from the menu.

Choosing the Reset Tool
control.
The Tool Mode
Next is the Tool Mode selection where we choose which kind of shape we want to draw. Shapes in Photoshop can be drawn as either vectors, paths or pixels.
Vector shapes are drawn using points connected together by directly or curved lines, and they remain scalable and editable without ever losing quality. A path is too scalable and editable, but it's simply the outline of the shape without any fill or stroke. And a pixel shape is made of pixels, just similar images.
In nearly cases, you'll want to describe vector shapes. And for that, the mode needs to be gear up to Shape, which it is by default.
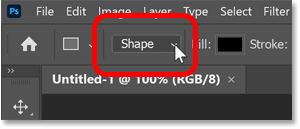
Brand sure the Tool Mode is fix to Shape.
The Make full Color
The Fill option is where we choose a color for the shape. The default shape colour is blackness. To choose a different color, click the Fill color swatch.
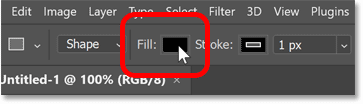
Clicking the Fill color swatch.
Then choose the kind of fill you demand using the icons forth the pinnacle of the panel. From left to right, we take No Color (which leaves the inside of the shape empty), a Solid Color preset, a Gradient preset or a Blueprint preset.
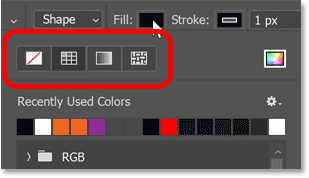
The No Color, Solid Color, Slope and Pattern fill up options.
If yous choose Solid Color, Gradient or Pattern, then twirl open one of the preset groups and choose a preset by clicking its thumbnail. Here I've selected the Solid Color preset pick and I've opened the RGB group to select a preset color.
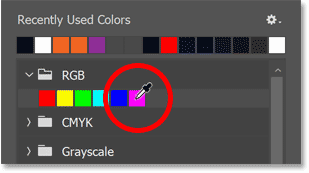
Choosing a Solid Colour preset.
Or to choose your own custom fill color for the shape, click the icon in the upper correct corner.
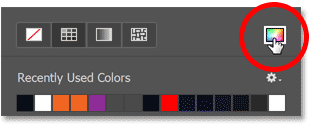
Clicking the Custom Make full Color icon.
So select a color from the Color Picker. I'll choose a majestic colour by setting the H (Hue) value to 295 degrees, the S (Saturation) value to 70 percentage and the B (Effulgence) also to 70 percent. Click OK to shut the Colour Picker when you're done.
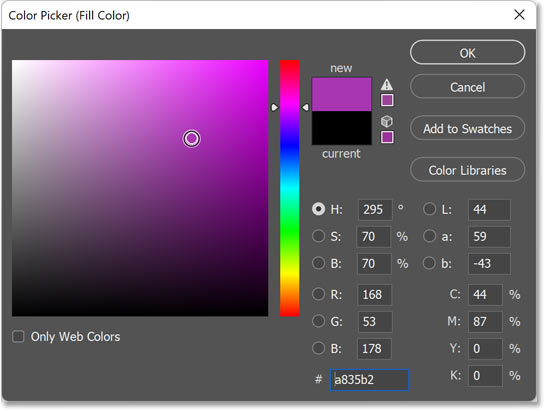
Choosing a custom make full colour for the shape.
The Stroke Color
The next two options in the Options Bar are for adding a stroke effectually the shape. By default, Photoshop adds a 1 pixel black stroke. To choose a different color, or no color, click the Stroke colour swatch.
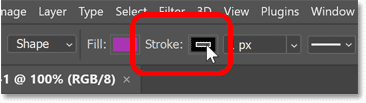
Clicking the Stroke color swatch.
And then utilise the icons along the top of the panel to cull from the same options we saw with the fill up colour. Once more from left to right, we have No Colour (for when you don't desire a stroke around the shape), a Solid Color preset, a Gradient preset, or a Blueprint preset.
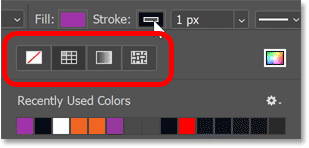
The No Colour, Solid Color, Gradient and Pattern stroke options.
Or click the icon in the upper right corner to cull a custom stroke color from the Color Picker. But in my case, I'll stick with the default black.
The Custom Stroke Color icon.
The Stroke Size
Next, set the width or thickness of the stroke past entering a Size value. I'll set information technology to xvi pixels. As we'll see, all of these options (make full color, stroke color, stroke size and more) can also be changed from the Properties panel afterwards we draw the shape.
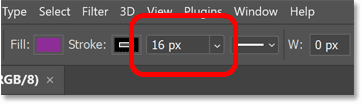
Entering a size for the stroke.
The Stroke Blazon, Alignment and more
For even more stroke options, click the Stroke Options box.
Opening the stroke options.
From here, you can fix the stroke Type to either a Solid, Dashed or Dotted line. Solid is the default. Or change the stroke's Alignment to either Inside, Outside or Centered on the outline of the shape. And you tin change the Cap Type or Corner Type if needed.
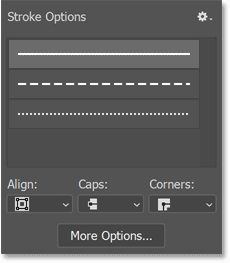
Choose the stroke type, alignment and more than.
If you lot click the More Options button at the bottom.
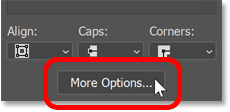
The More Options button.
A separate dialog box opens with well-nigh of the same options, but you can also create your own custom dashed or dotted line, and save your settings as a preset. Since we're only roofing the basics here (and at that place's lots more to embrace), I'll click Cancel to close the dialog box.
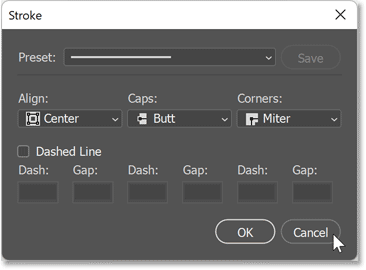
The Stroke Options dialog box.
The Width and Height
Next in the Options Bar are the Width (W) and Height (H) fields. But rather than allowing you to set a width and height for your shape earlier you describe it, these options are used to change the width and height after you've drawn the shape.
Y'all can ignore the Width and Summit options in the Options Bar because they can easily be changed in the Properties panel subsequently we draw the shape.
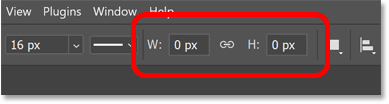
The Width and Height fields (used for irresolute the size subsequently the shape is drawn).
Path Operations, Path Alignment and Path Arrangement
The next 3 icons subsequently the Width and Height fields hold options that I'll cover in more detail in a split tutorial.
Only briefly, clicking the first icon, Path Operations, opens a list of ways to combine two or more than shapes into a larger or more complex shape. The default setting, New Layer, draws a separate and independent shape each time.
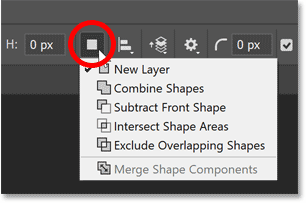
The Path Operations commands.
The next icon, Path Alignment, opens all the means to align or distribute multiple shapes. The Align To option at the bottom lets you switch betwixt adjustment shapes to a selection or to the canvas.
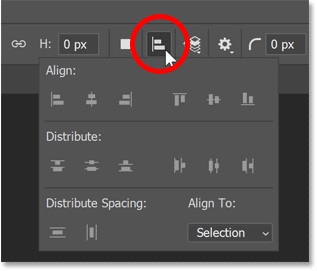
The Path Alignment options.
And the tertiary icon, Path Organization, holds commands for moving the selected shape in a higher place or below the other shape(s) that information technology'due south combined with, similar to moving layers in a higher place or below each other in the Layers panel.
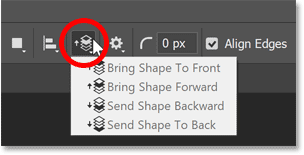
The Path Organization commands.
The Gear icon
The adjacent set of options are found by clicking the Gear icon in the Options Bar.
Offset are the Path Options for changing the Thickness or Color of the path outline effectually the shape. Only don't confuse a path outline with a stroke. Paths be simply in Photoshop and practise not appear when you lot print your piece of work or when yous salvage it as a jpeg, png or other file format. These path options be only to make the path outline easier to see while working in Photoshop. To place an bodily outline or border around the shape, you demand to add a stroke.
I'll increase the thickness to 2 px simply to brand the path easier to see as we become through this tutorial. Just in most cases, the default thickness of ane px works fine.
Below that are options for setting a custom size or attribute ratio for the shape before yous draw it, forth with the pick to draw the shape out from its middle rather than from a corner. But I would avoid these options because they are sticky, meaning that they remain selected until you lot come up dorsum and cull a different 1, which tin can quickly become abrasive. Instead, I'll bear witness you a ameliorate way to access these options from your keyboard.
The options nether the Gear icon.
The Corner Radius
Adjacent is the Corner Radius option, which is but visible when the Rectangle Tool, Triangle Tool or Polygon Tool is active in the toolbar. Corner Radius lets you lot set the roundness of the shape's corners before you describe the shape by entering a value, in pixels.
But again, there are like shooting fish in a barrel means to adjust the corner radius after the shape is drawn, and so there's no reason to set it hither unless yous know the verbal value you demand.

The Corner Radius option.
Align Edges
Finally, the Align Edges option aligns the edges of your shape to Photoshop'south pixel grid, which I covered in the Zooming and Scrolling Images tutorial. Aligning the edges to the pixel grid keeps the shape'southward edges looking abrupt, so you'll want to leave Align Edges checked.
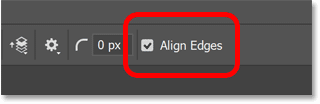
The Marshal Edges option.
How to draw shapes with the shape tools
So now that we've gone through the shape options in the Options Bar, let's look at how to depict dissimilar kinds of shapes using Photoshop's various shape tools. We'll showtime with the Rectangle Tool which draws uncomplicated four-sided shapes. I'll show yous all the ways to use the Rectangle Tool, but much of what nosotros'll cover applies to the other shape tools as well.
Select the Rectangle Tool
First, in the toolbar, make sure the Rectangle Tool is selected.
Selecting the Rectangle Tool.
How to draw a rectangle shape
Click on the canvas to set a starting point for the shape, and then drag away from that betoken. As you lot drag, you won't see the shape's fill or stroke color. All you will meet is the path outline.
Click and elevate to start cartoon the shape.
How to reposition the shape as y'all draw
If you press and hold the spacebar on your keyboard while your mouse push is still down, y'all can drag the shape outline around the canvas to reposition information technology. Then release the spacebar to continue dragging out the shape.
Completing the shape
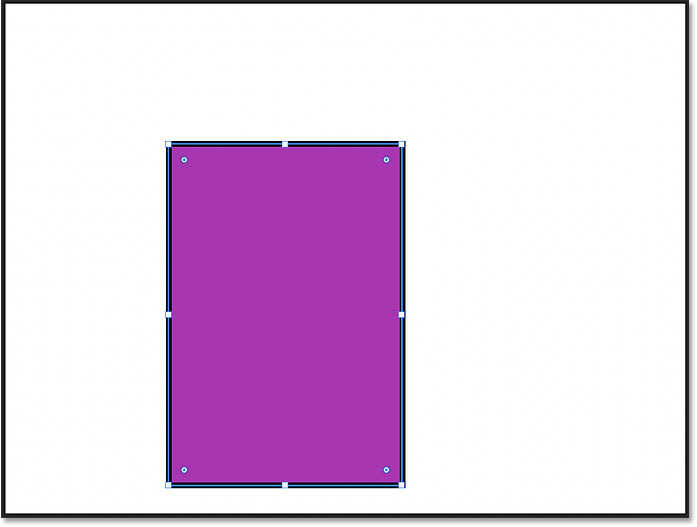
Release your mouse button to complete the shape. The path outline is still visible only so are the fill and the stroke.
Photoshop completes the shape when y'all release your mouse button.
The shape layer
In the Layers console, the new shape appears on its own shape layer. And because the shape was drawn using the Rectangle Tool, Photoshop names the layer Rectangle 1
. Since shapes are added on their own layers, it means a shape can be scaled, edited, moved or deleted without affecting any other shapes or other elements in the document.
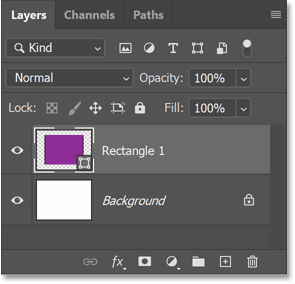
Each new shape automatically appears on its own shape layer.
Turning shape layers on and off
I'll hide the shape so we tin can await at more ways to use the Rectangle Tool by clicking the shape layer's visibility icon.
Clicking the shape layer's visibility icon.
How to draw a perfect square
To depict a perfect foursquare with the Rectangle Tool, click to set a starting signal for the shape and then begin dragging. Press and concur the Shift cardinal on your keyboard to lock the shape'south aspect ratio to a perfect square and then continue dragging.
Brainstorm dragging, then hold Shift and continue dragging.
Release your mouse push button to consummate the shape, and so release the Shift key. Brand sure to release your mouse button before releasing Shift, otherwise it won't work.
The Shift key can also be used to draw a perfect circle with the Ellipse Tool, an equilateral triangle with the Triangle Tool, or a symmetrical polygon shape with the Polygon Tool, all of which we'll await at in a moment.
A perfect square fatigued using the Rectangle Tool.
In the Layers console, the second shape appears on its own shape layer above the beginning. Hide the 2nd shape by clicking its visibility icon and so we can look at a 3rd way to use the Rectangle Tool.
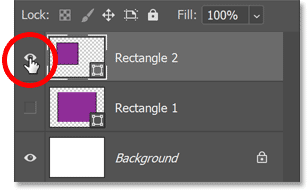
Hiding the second shape.
How to describe a shape at an exact size
If you know the verbal size that the shape needs to be, then instead of clicking and dragging, simply click on the sail and release your mouse button.
The Create Rectangle dialog box opens where y'all can enter a width and summit for the shape, in pixels. Notation that while the dialog box currently says "Create Rectangle" because I'm using the Rectangle Tool, this trick can be used with whatsoever shape tool to draw the shape at an exact size.
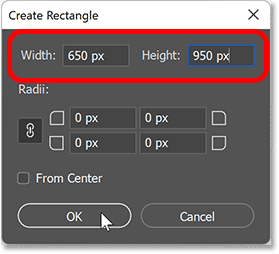
Entering verbal dimensions for the shape.
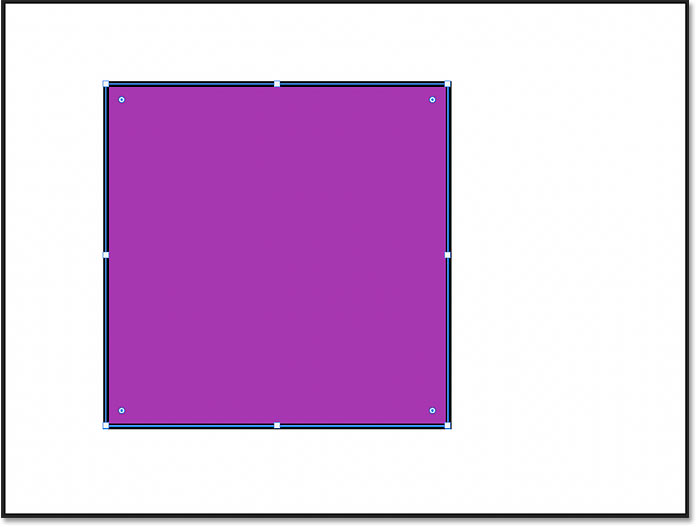
Click OK to shut the dialog box, and the shape instantly appears.
Photoshop draws the shape at the verbal width and height.
How to motility a shape effectually the canvas
To motility the shape to a new location afterwards you draw it, switch from your shape tool to the Path Choice Tool (the blackness arrow) in the toolbar, located direct above the shape tools.
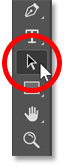
Selecting the Path Choice Tool.
Then simply click on the shape and drag it into place.
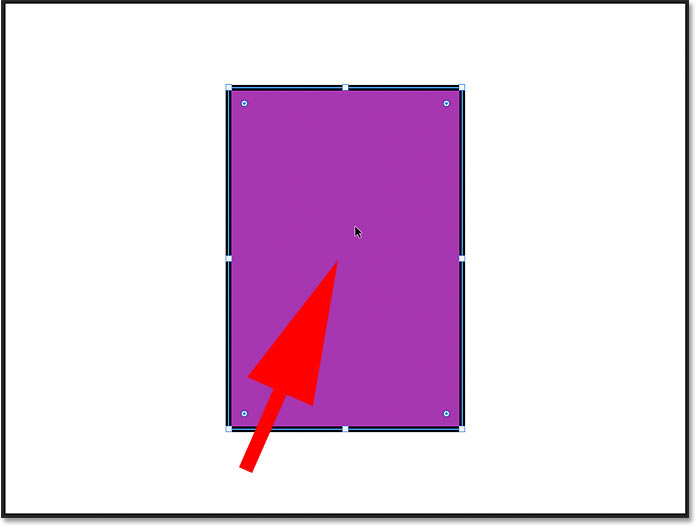
Moving the shape with the Path Selection Tool.
Tip! Access the Path Choice Tool temporarily
Instead of choosing the Path Selection Tool from the toolbar, you can access it temporarily from your keyboard by belongings the Ctrl (Win) / Command (Mac) primal. With the key held downwards, click and elevate to move the shape. Then release the key to switch back to your shape tool.
Tip! Select shapes merely by clicking on them
And here's a tip you tin can use when you've fatigued multiple shapes in your document, each on its ain layer, and you need to select individual shapes to move them around.
Select the Path Selection Tool from the toolbar so you can access its options in the Options Bar. So in the Options Bar, change the Select option from Agile Layers to All Layers. You tin then click on whatsoever shape to select information technology without needing to click on the shape's layer in the Layers panel.
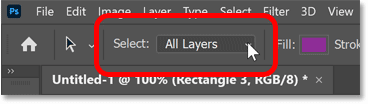
Irresolute Select to All Layers in the Options Bar.
More tricks for drawing shapes
Earlier I mentioned that yous can reposition a shape as you draw information technology by holding the spacebar on your keyboard, dragging the shape into place, and then releasing your spacebar to go on dragging out the shape. This works with any of Photoshop's shape tools.
To depict a shape from its centre rather than from a corner, click to gear up the starting bespeak and begin dragging. Then concur the Alt (Win) / Option (Mac) key on your keyboard and continue dragging. Release your mouse push button to consummate the shape, and and so release the Alt (Win) / Option (Mac) key.
How to delete a shape
To delete a shape, click on its shape layer in the Layers panel and drag the layer down onto the Trash Bin. Or with the layer selected, printing the Delete on your keyboard.
Dragging a shape layer onto the trash bin to delete it.
How to reselect a shape
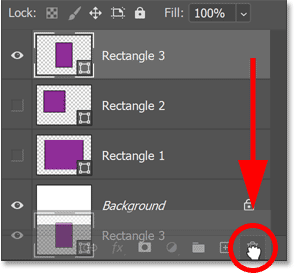
To reselect an existing shape in your document, click on its shape layer in the Layers console. And if the shape was turned off, click its visibility icon to turn it dorsum on.
Selecting and turning on the second shape layer.
Editing the shape with the on-canvas controls
Back in Photoshop 2021, Adobe added on-sheet controls to shapes. These controls appear around the shape after yous depict it, and make it easy to scale, resize or rotate the shape without needing to use the Free Transform command. The on-sheet controls can also exist used to adapt the roundness of a shape's corners. Hither'due south how to apply them.
How to resize the shape
To resize a shape using the on-canvas controls, click and drag any of the handles (the squares that appear effectually the path outline). By default, dragging a handle will resize the shape non-proportionally, meaning that each side or corner can be moved without moving whatever others.
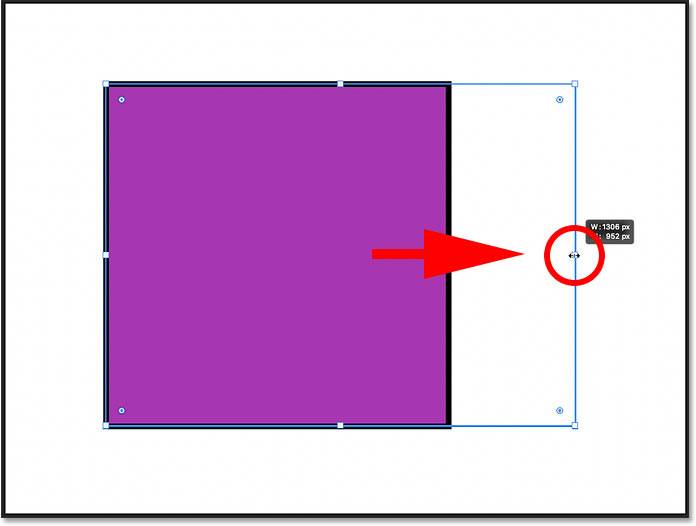
Drag a handle to resize the shape.
To scale the shape proportionally, concur the Shift primal on your keyboard as you drag a handle. Simply retrieve to release your mouse push button first before releasing the Shift key.
Y'all tin also hold Alt (Win) / Option (Mac) while dragging to resize the shape from its heart, or Shift+Alt (Win) / Shift+Option (Mac) to resize it proportionally from its center.
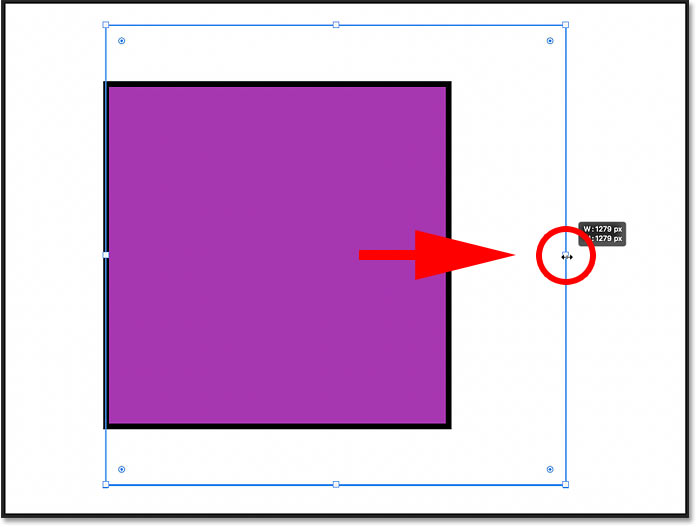
Hold Shift while dragging a handle to resize the shape with the aspect ratio locked.
How to disengage a transformation
To disengage the final transformation y'all made to the shape, go up to the Edit carte du jour and choose Undo Transform Path. Or press Ctrl+Z (Win) / Control+Z (Mac) on your keyboard. Press Ctrl+Z (Win) / Command+Z (Mac) repeatedly to undo multiple steps in a row.
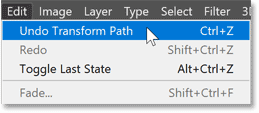
Going to Edit > Undo Transform Path.
How to rotate a shape
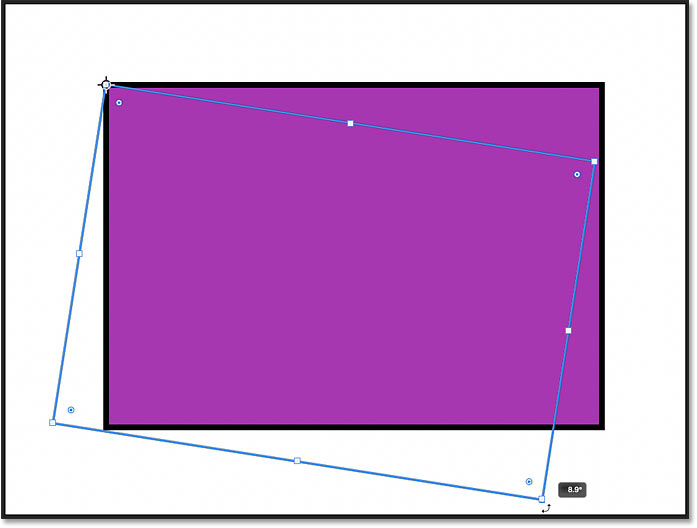
To rotate a shape using the on-canvas controls, move your cursor just outside the path outline. When the cursor changes to a rotate icon (a curved double-sided arrow), click and drag to rotate the shape effectually its center.
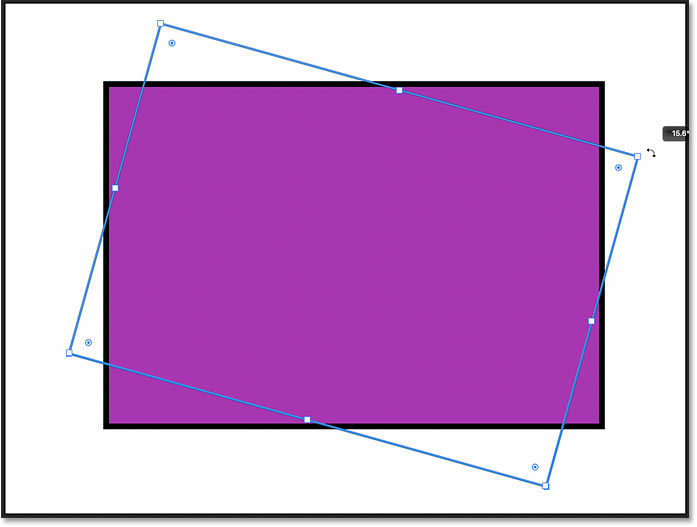
Click and elevate exterior a corner to rotate the shape.
How to rotate a shape from its corner
Shapes can also be rotated around a corner or other location past moving the reference betoken. The reference point is the target icon that appears in the center of the shape by default. If you lot're non seeing the reference signal, I show you how to plough information technology on next.
The reference point in the center of the shape.
How to testify the reference point
If the reference point is not visible, you'll demand to plow information technology on in Photoshop'south preferences. On a Windows PC, become upwardly to the Edit menu in the Carte Bar. On a Mac, go upwardly to the Photoshop menu. From there, choose Preferences and and so Tools.
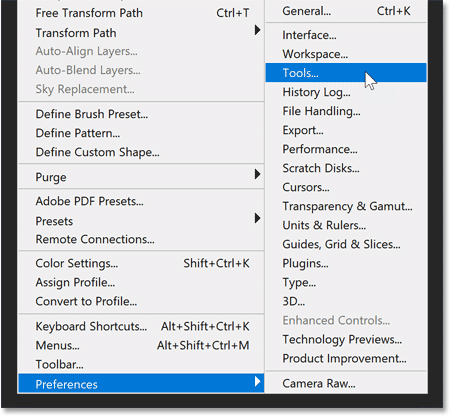
Opening the Tools preferences.
And so in the Preferences dialog box, select Show Reference Point when using Transform. You'll only demand to practise this once. And as a bonus, the reference point volition now be visible non only with shapes but anytime you employ Photoshop's Free Transform control. Click OK to close the dialog box when you're done.
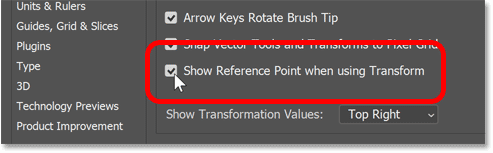
Turning on Testify Reference Point when using Transform
.
Click and drag the reference betoken to a new location. I'll move it onto the handle in the upper left corner:
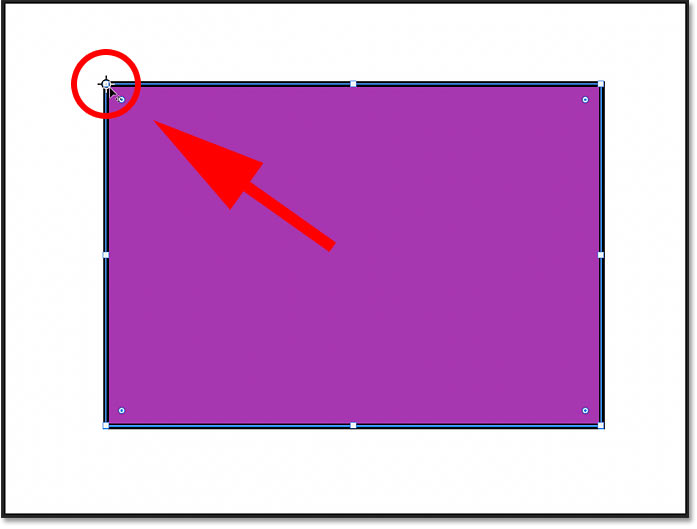
Moving the reference betoken onto a corner handle.
And now when y'all rotate the shape, it rotates effectually the new betoken. Note that the reference point icon automatically resets to the eye of the shape when you release your mouse button.
The shape is rotating around the upper left corner.
How to round the shape'south corners
The on-canvas controls can also be used to adjust the roundness, or radius, of the shape's corners, although this characteristic depends on which shape tool was used.
With the Rectangle Tool, all four corners can be rounded at once, or a single corner can be rounded independently. Just shapes drawn with the Triangle Tool or Polygon Tool are express to a single control that affects all corners at the same fourth dimension. And the Ellipse Tool and Line Tool do not allow rounded corners at all.
The radius controls are the pocket-size circles only inside the corners.
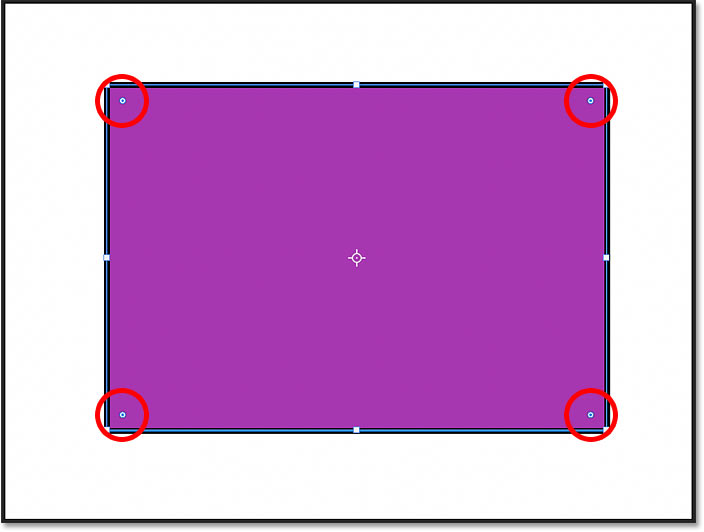
The corner radius controls for the shape.
Rounding all corners at once
For rectangle and square shapes that take a radius command in each corner, drag whatever of the controls to round all four corners at the same time and by the same corporeality:

Dragging a radius command to circular all corners at the same time.
Rounding a unmarried corner independently
To accommodate a single corner without affecting the others, concord Alt (Win) / Choice (Mac) on your keyboard and drag the corner's radius control.
But if you know the exact radius value you demand for the corner(south), and so instead of dragging with the on-canvas controls, you tin enter the exact value in Photoshop'south Properties panel, which nosotros'll await at next.
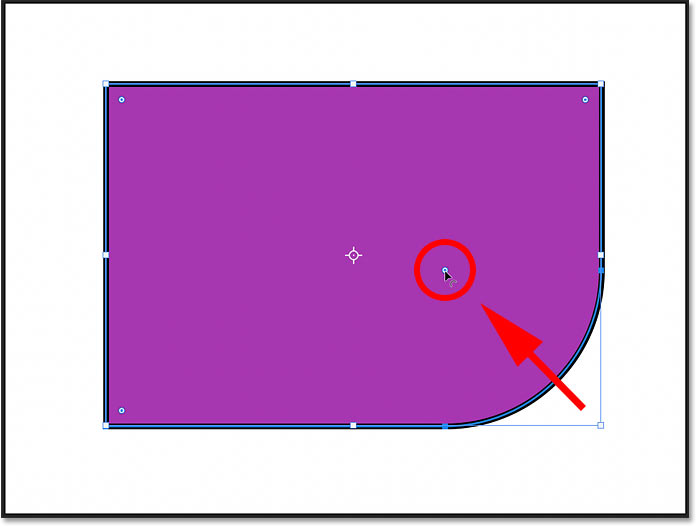
Hold Alt (Win) / Pick (Mac) to circular a single corner.
The Live Shape backdrop in the Properties panel
While the on-canvas controls are user-friendly, they're non the merely way to arrange the appearance of your shape. In fact, any shape drawn with 1 of Photoshop's geometric shape tools (the Rectangle, Ellipse, Triangle, Polygon, or Line Tool) is what Adobe calls a Live Shape.
A Live Shape ways that after the shape is drawn, all of its properties remain live
and editable. And the properties are found in the Properties panel.
Since I currently have a rectangle shape selected, the Backdrop panel is showing options for a shape drawn with the Rectangle Tool. But most of the options will be the same no matter which tool was used.
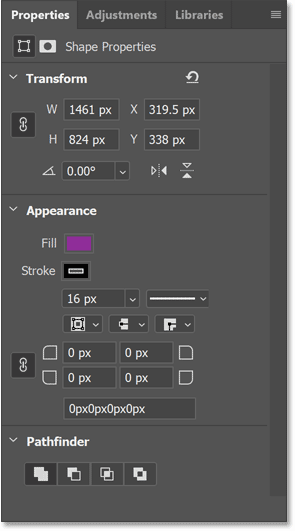
The Live Shape properties in the Properties panel.
The Transform properties
The Properties console is divided into sections, and the first section at the tiptop is Transform. The Transform options are the aforementioned for all shape tools.
The shape'due south Width, Height and Location
In the Transform properties, yous can edit the shape'southward Width (W) or Superlative (H), and click the link icon to link or unlink the width and height values. The 10 and Y coordinates can be used to set a specific location for the shape on the canvas. 10 is the horizontal distance from the left of the canvass and Y is the vertical altitude from the top.
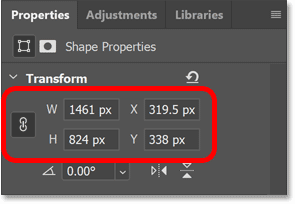
The Width, Summit and X, Y values.
The Rotation angle
The Angle option sets the rotation of the shape. To reset the angle, enter a value of 0 degrees. If you rotated the shape using the on-canvas controls, the current angle appears and can exist adjusted from here.
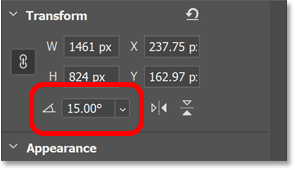
The Angle option.
Clicking the arrow adjacent to the angle value opens a list of preset angles to choose from.
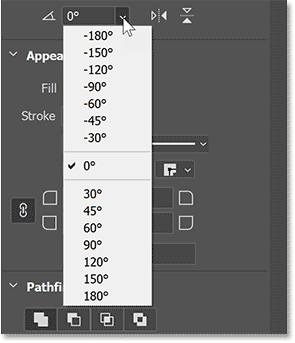
The angle presets.
Tip! Changing values with the scrubby slider
The width and height, X and Y values, and the rotation angle can all be changed using Photoshop's scrubby slider. Click on a property'southward proper noun (for example, the letter of the alphabet W for the width), keep your mouse button held downwards, and elevate left or right to alter the value.
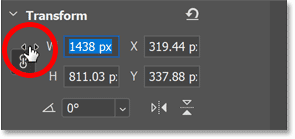
Click and drag to use the scrubby slider.
Flipping the shape'south orientation
Finally, you can use the Flip Horizontal or Flip Vertical icons to flip the shape's orientation.
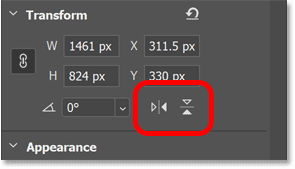
The Flip Horizontal and Flip Vertical options.
The Appearance properties
The Advent section in the Properties console holds options for changing the shape's fill up color, the stroke color, the thickness of the stroke, and more. It'due south also where we adjust the roundness of the corners. The fill and stroke options are the same for all shapes, only the corner options will change depending on the shape tool that was used.
The Fill and Stroke color
Click the Fill or Stroke color swatches to change the colors. You'll find the same options for choosing colors that we saw earlier in the Options Bar.
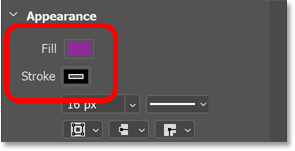
The Make full and Stroke color options.
The stroke Size and other options
Below the color swatches are more options for the stroke that are copied over from the Options Bar. You tin can alter the Size of the stroke, or click the Stroke Options box to the right of the size to change the stroke Type from a solid to a dashed or dotted line.
The iii icons below the stroke size let you change, from left to right, the stroke's Alignment (Within, Outside or Centered), the Cap Type and the Corner Type.
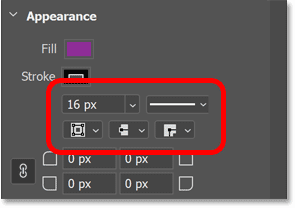
The stroke size, line type, alignment, cap type and corner blazon backdrop.
The Corner Radius
Earlier we learned how to adjust the roundness of the shape'south corners using the on-canvas controls. Only you can too adjust the corner radius here in the Backdrop panel. In fact, when you lot utilise the on-canvas controls, y'all'll run across the radius values changing in the Properties panel.
By default, the four boxes (one for each corner) are linked together, so entering a new value for one corner changes all four by the same amount. To unlink the boxes (or link them together over again), click the link icon.
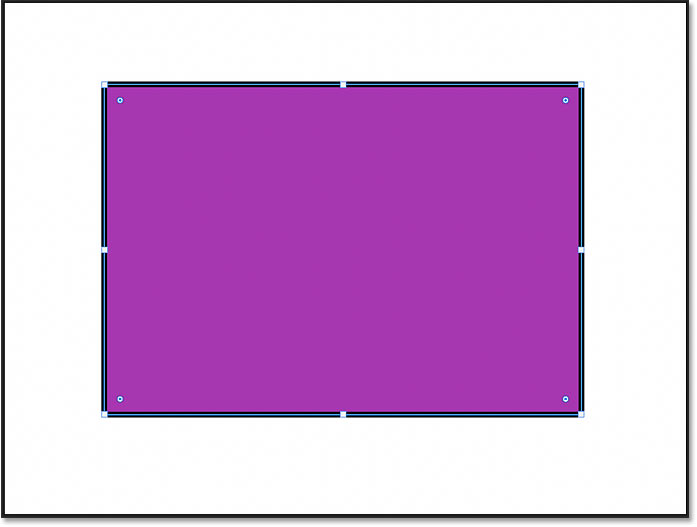
Here I've changed the radius value of the upper left corner to 60 pixels. And because all four corners were linked together, they all inverse to threescore pixels when I pressed Enter (Win) / Return (Mac) to accept the new value.
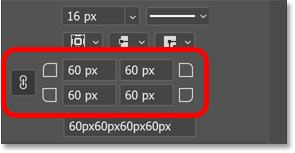
By default, irresolute one corner changes them all.
Below the individual boxes is a larger box that displays the current radius values for all corners at once. The get-go value is the height left corner, and so the top right, the bottom right, and the bottom left. You lot tin can highlight any value to change it and only that one corner will exist affected, even if the corners are linked together.
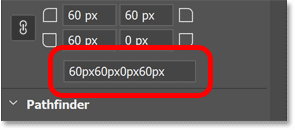
The bottom box shows all corner radius values at once.
The Pathfinder backdrop
Finally, the Pathfinder section at the bottom of the Properties panel holds the aforementioned options for combining shapes that we saw before in the Options Bar. From left to correct, we have Combine Shapes, Decrease front end shape, Intersect shape areas, and Exclude overlapping areas. These options are the same for all shape tools, and once again, I'll cover them in a separate tutorial.
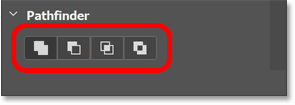
The Pathfinder options.
Drawing shapes with Photoshop's other shape tools
At this point, we've covered most of the basics for drawing shapes in Photoshop. We know where to find the various shape tools in the toolbar, and we've looked at the options in the Options Bar, like choosing a fill and stroke colour, which are mostly the same for each tool. Nosotros know how to draw shapes by clicking and dragging on the sheet, how to edit the shapes using the on-sail controls, and how to edit the Live Shape properties in the Properties panel.
But since the but shape tool we've used and then far is the Rectangle Tool, let's accept a quick look at Photoshop's other geometric shape tools. I won't echo everything that'due south the same with each tool and that we've already covered. Instead, we'll focus mostly on features that are unique to each tool.
The Ellipse Tool
While the Rectangle Tool draws rectangles and squares, the Ellipse Tool draws round or elliptical shapes, including perfect circles. Other than that, both tools deport much the same. Merely since elliptical shapes have no corners, yous won't find any options to conform them.
To select the Ellipse Tool, click and hold on the Rectangle Tool in the toolbar, or whichever shape tool you used last. Then choose the Ellipse Tool from the menu.
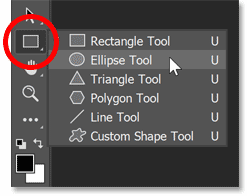
Selecting the Ellipse Tool.
Drawing an elliptical shape
Click and drag in the document to draw an elliptical shape, or hold Shift as you lot drag to draw a perfect circumvolve equally I'thousand doing here:
Click and elevate an elliptical shape, or add together Shift to draw a circle.
Editing the shape with the on-canvas controls
Release your mouse push button to draw the shape, and so drag any of the on-sail command handles to resize it as needed. Hold Shift as you elevate to lock the original aspect ratio in identify, or hold Alt (Win) / Option (Mac) to resize the shape from its center.
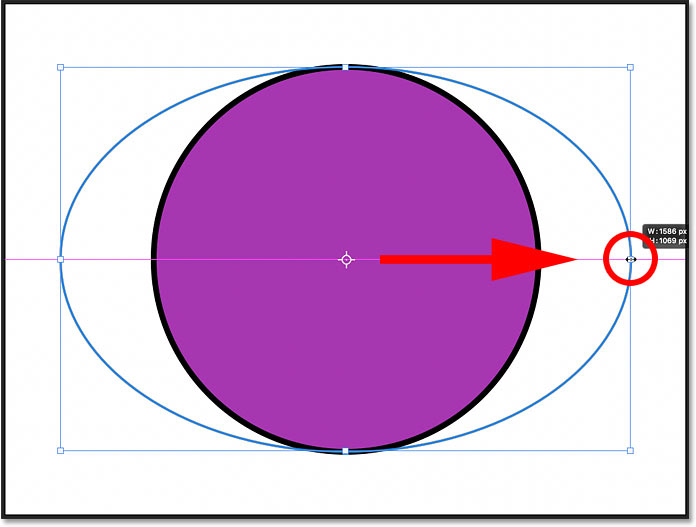
Belongings Alt (Win) / Option (Mac) to resize the elliptical shape from its heart.
The Live Shape properties
In the Properties panel, the Ellipse Tool shares the same editable Live Shape properties every bit the Rectangle Tool. The only backdrop missing are the corner radius options since they don't employ. Only yous can still change the width and height, the fill and stroke colour, and more.
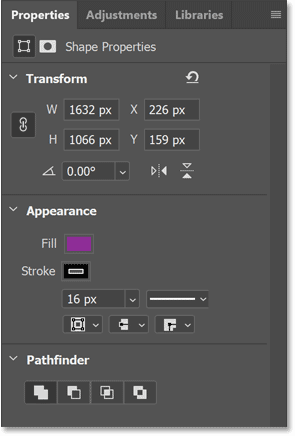
The Live Shape properties for the Ellipse Tool.
The Triangle Tool
The Triangle Tool was first introduced in Photoshop 2021. Before that, drawing a triangle shape involved selecting the Polygon Tool (which we'll look at next) and setting the number of sides to 3. Just we now have a dedicated Triangle Tool so you lot don't need to remember that a triangle is just a iii-sided polygon. And we can even circular the triangle's corners using either the on-canvas controls or the Live Shape backdrop in the Properties panel.
To select the Triangle Tool, click and hold on whichever shape tool appears in the toolbar, which will always be the terminal tool that was used. Then choose the Triangle Tool from the list:
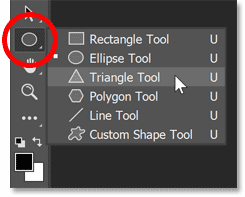
Selecting the Triangle Tool.
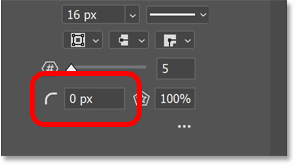
The Corner Radius pick in the Options Bar
Similar the Rectangle Tool, the Triangle Tool includes a Corner Radius option in the Options Bar which can exist used to set the roundness of the corners before drawing the shape. Merely to draw a triangle with sharp corners, go out the radius at its default value of 0 px.

The Triangle Tool's corner radius option in the Options Bar.
Drawing a triangle shape
Click and drag in the certificate to describe a triangle shape, or hold Shift every bit you drag to draw an equilateral triangle where all three sides are the same length. And as with all the shape tools, you lot can hold Alt (Win) / Pick (Mac) to draw the shape out from its eye.
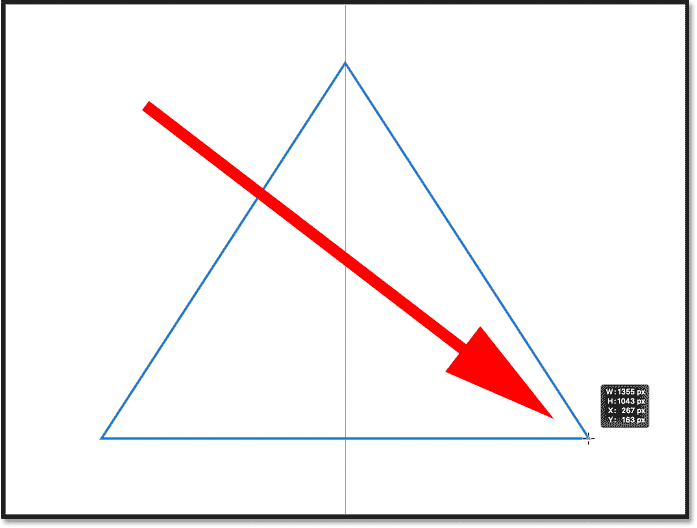
Drawing a triangle with the new Triangle Tool.
Rounding the triangle corners
Release your mouse button to complete the shape, then utilize the on-canvass controls to scale, resize or rotate the triangle if needed.
Triangles too include a single corner radius control at the top.
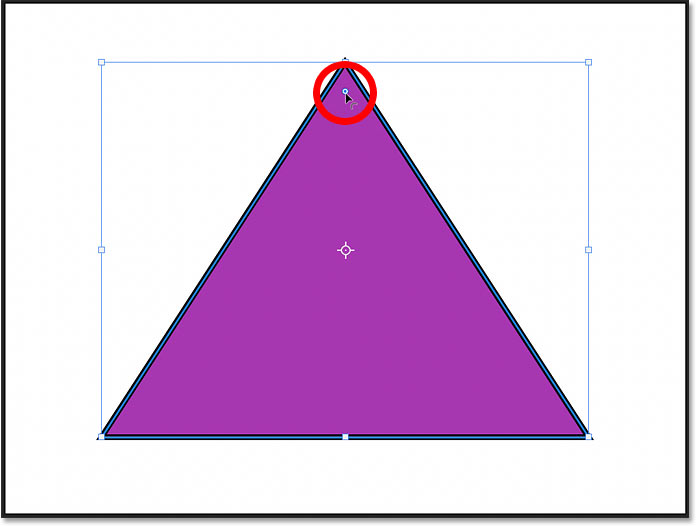
The corner radius control for triangle shapes.
Dragging the control upwardly or downwards will adjust the roundness of all three corners of the triangle at once.
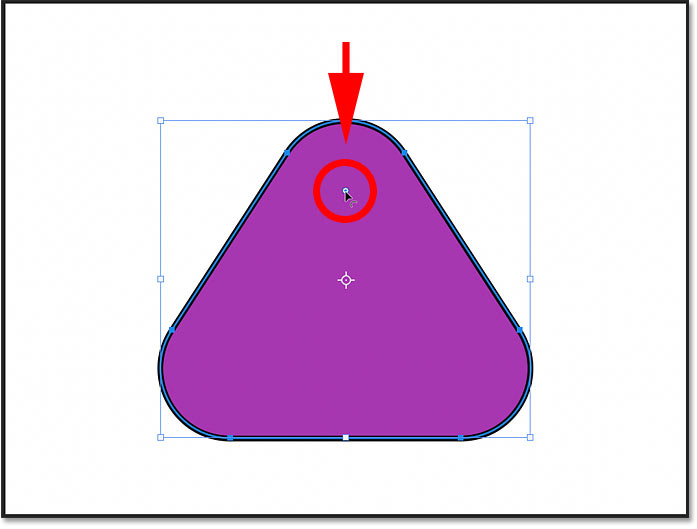
Rounding the corners by dragging the radius control.
The corner radius can likewise exist adjusted in the Properties panel along with all of the other Live Shape properties that are common with all shapes:
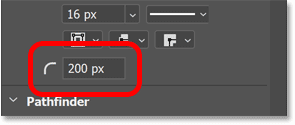
The corner radius selection in the Properties panel.
The Polygon Tool
While the Triangle Tool draws three-sided shapes and the Rectangle Tool draws shapes with four sides, the Polygon Tool in Photoshop can draw shapes with as many sides as yous need. It can even draw stars, every bit we'll see in a moment.
Select the Polygon Tool in the toolbar by clicking and holding on the last shape tool that was used, and and then cull the Polygon Tool from the list:
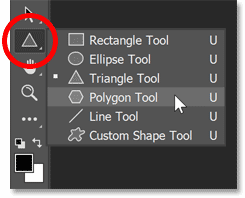
Selecting the Polygon Tool.
The Sides and Radius options
Along with the standard shape tool options in the Options Bar, the Polygon Tool also includes a box for entering the number of sides and for setting the corner radius. If you lot know the number of sides you need, you tin set it here before drawing the shape. Or y'all can leave these options at their defaults (sides = 5, radius = 0 px) and adjust them in the Properties panel after the shape is drawn.
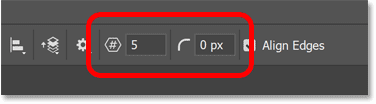
The number of sides (left) and corner radius (right) options for the Polygon Tool.
Cartoon the polygon shape
Click and drag in the document to draw the polygon shape. Hold Shift as yous drag to depict a symmetrical polygon with all sides the aforementioned length.
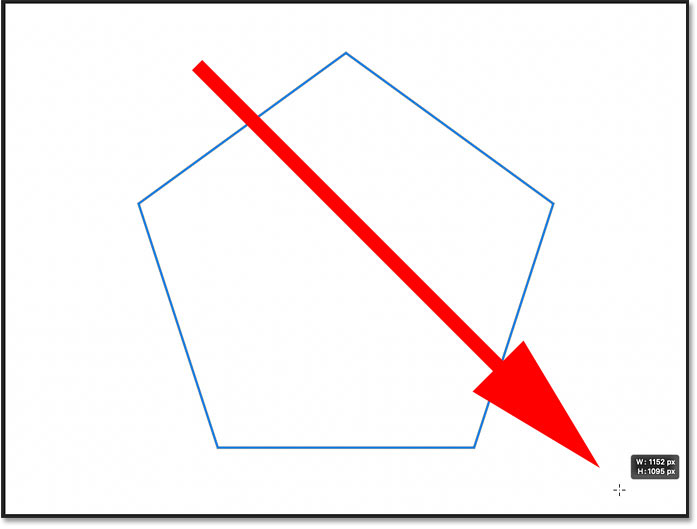
Belongings Shift while dragging to draw a symmetrical polygon.
Release your mouse button to complete the shape:
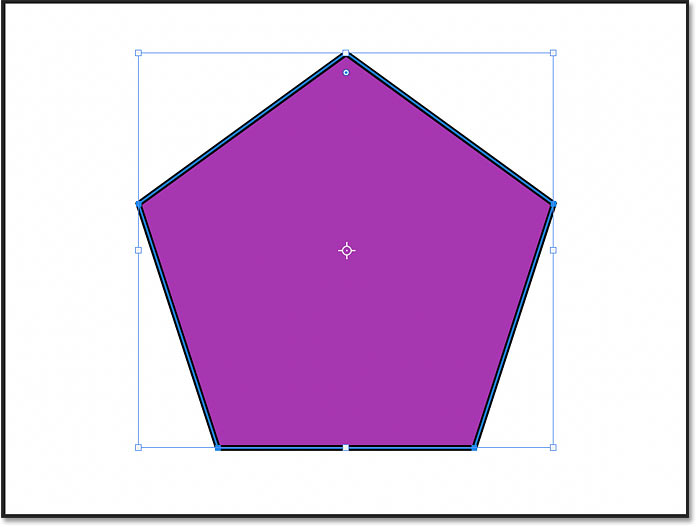
The completed polygon shape.
The on-canvas Radius command
Only like the Triangle Tool, shapes drawn with the Polygon Tool include a single corner radius control at the top. Elevate the control up or downward to circular all corners of the polygon at once.
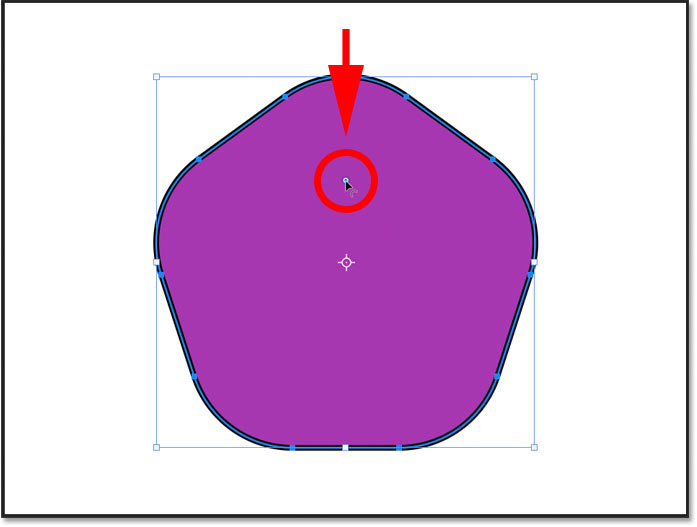
Rounding the corners with the On-Canvas Controls.
The Radius choice in the Backdrop panel
Or you tin conform the radius from the Properties panel. I'll reset information technology dorsum to 0 px.
The Radius selection.
Changing the number of sides
You can change the number of sides for the polygon in the Properties panel. I'll increment it from 5 to 6:
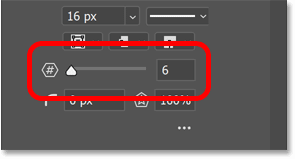
The Sides option.
And since the polygon is a Live Shape, it instantly updates from v to half-dozen sides:
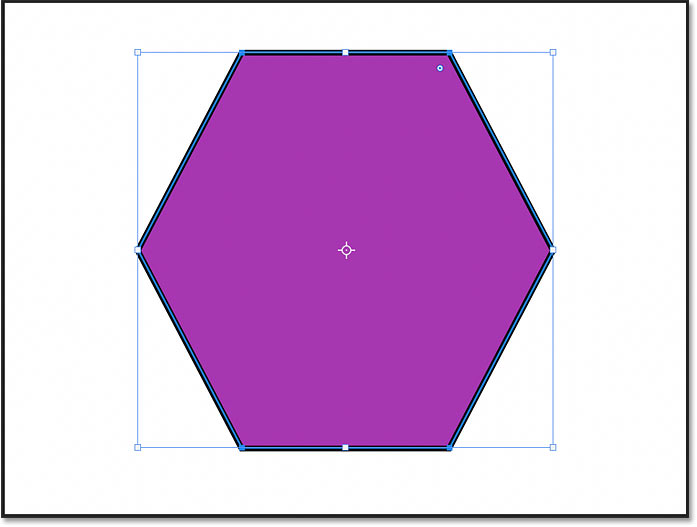
The six-sides polygon shape.
How to draw stars with the Polygon Tool
To turn your polygon shape into a star, lower the Star Ratio option in the Properties panel. The more than you lower the value below 100%, the more the sides of the polygon will indent towards the center.
I'll set the number of sides dorsum to five. And I'll lower the Star Ratio down to 47%, which is the value you need to draw a perfect 5-point star.
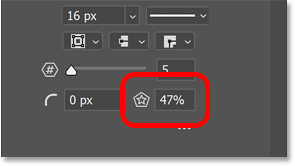
The Star Ratio option.
And the polygon instantly turns into a star shape.
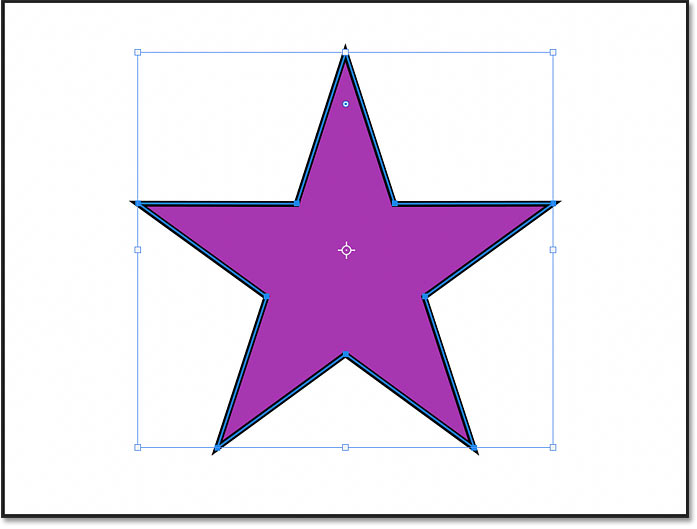
The issue after lowering the Star Ratio value.
The Smooth Star Indents option
Click the ellipsis icon (the three dots):
Clicking the ellipsis.
To reveal the Smooth Star Indents option.
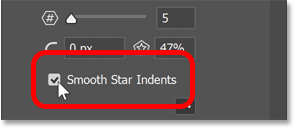
Selecting "Smooth Star Indents".
With Smooth Star Indents enabled, the star'southward indents become rounded instead of sharp:

The star with Smooth Star Indents turned on.
The Line Tool
The last of Photoshop's geometric shape tools, and the final tool we'll look at in this tutorial, is the Line Tool. The Line Tool is used to draw straight lines, and you can add an arrowhead at either the start or end of the line.
To select the Line Tool in the toolbar, click and agree on the last shape tool that was used, and then choose the Line Tool from the list:
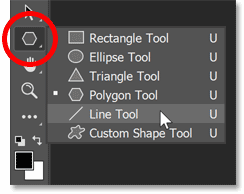
Selecting the Line Tool.
Choosing a line color
The Line Tool is different from the other shape tools in that the colour of the line is actually controlled past the stroke color, non the fill color. That's because a line is actually just a straight path with a stroke effectually it.
To choose a line color, click the Stroke colour swatch:
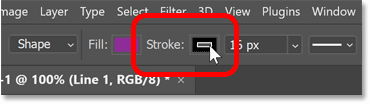
Clicking the Stroke color swatch.
Then use the icons along the acme left of the panel to cull from a Solid Color preset, a Gradient preset or a Pattern preset. Or click the icon in the height correct to select a custom colour from the Color Picker.
I'll click the Solid Colour preset option. Then I'll twirl open up the Pure group of presets and cull orangish equally my line color by clicking its thumbnail:
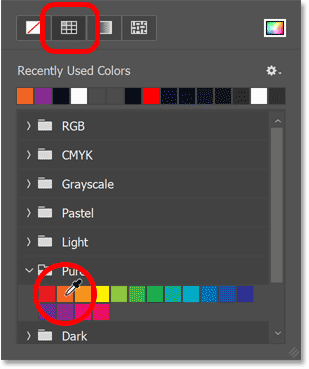
Choosing a line (stroke) color.
Setting the line weight with the stroke size
The weight, or width, of a line is controlled past the stroke size. And so notwithstanding in the Options Bar, I'll set the size to 100 px just to make the line piece of cake to come across.
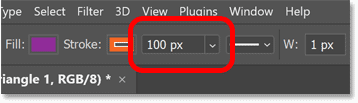
Changing the stroke size to gear up the line weight.
How to depict an arrow with the Line Tool
While you lot may, on occasion, take a need to draw unproblematic straight lines, the Line Tool is more often used to draw arrows. Arrowheads tin can be added to the beginning or cease of a line but must exist added before the line is drawn. Even though lines are Live Shapes with editable properties in the Properties panel, arrowheads are not something that can be added or edited later.
To add an arrowhead to the line, click the Gear icon in the Options Bar.
Clicking the Line Tool'south Gear icon.
In the Arrowhead options, add the arrowhead to either the Start or Cease of the line, or both. I'll choose the end. Then enter a Width and Length for the arrowhead, in pixels. I'll set the width to 120 px and the length to 150 px, over again just and so it's easy to see.
Unfortunately, choosing the correct arrowhead size can be tricky because at that place is no way to preview the issue until you draw the shape, and you tin't edit the size after you draw the shape. So if yous become it incorrect, you lot'll demand to delete or undo the line, click the Gear icon in the Options Bar, change the width or length value, so describe a new line to try once again.
Use the Concavity option if you want to indent the base, or bottom, of the arrowhead. I'll set it to 20%.
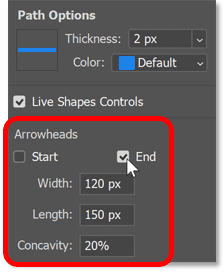
The Arrowhead options for the Line Tool.
How to draw the line
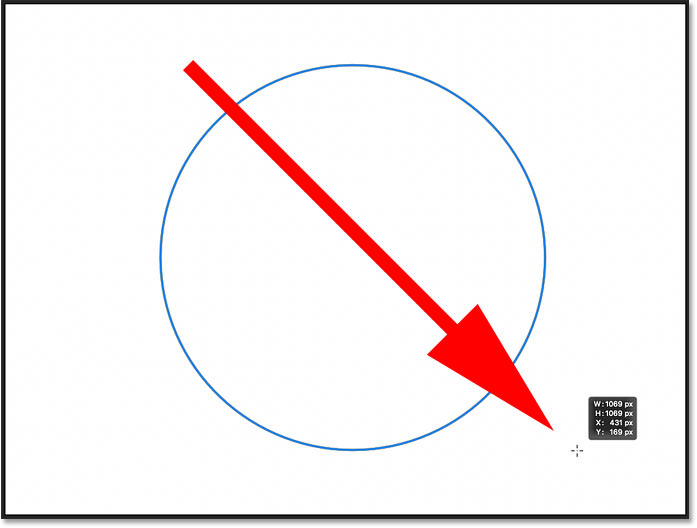
To draw your line or arrow, click on the canvas to set the starting point. Then keep your mouse button held downward and elevate away from that point to set the line's length and management. Agree Shift equally you drag to limit the direction to horizontal, vertical or a 45 degree bending.
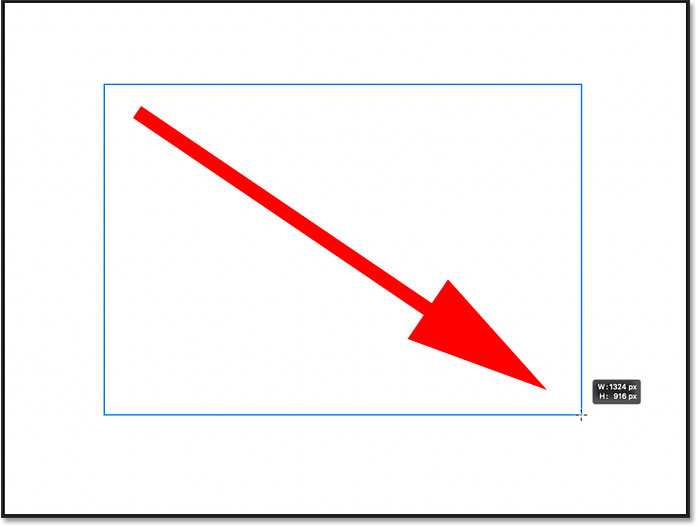
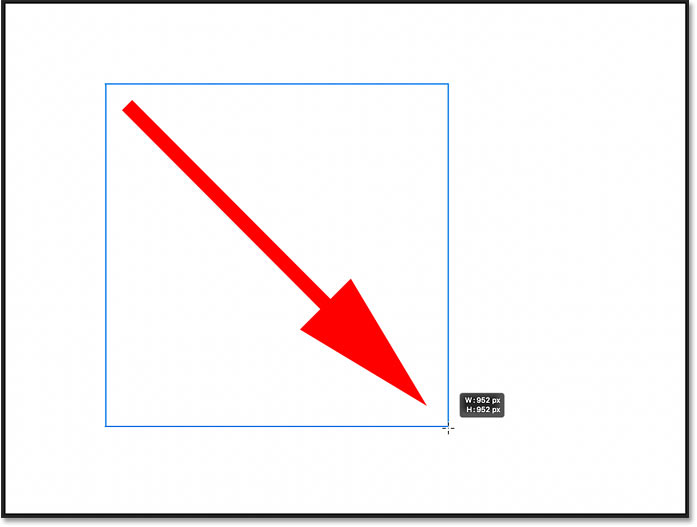
As y'all drag, all you will see is the line's path. If you added an arrowhead, you'll also come across the arrowhead's path. And notice that because I set the Concavity selection to 20%, the base of the arrowhead is indented.
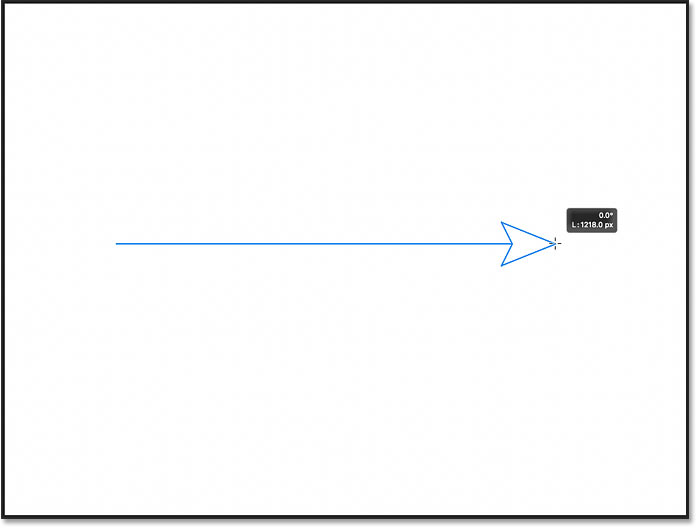
Clicking and dragging to draw the line.
Release your mouse button to complete the line, at which point the stroke around the path appears, giving the line its color.
The stroke appears when your mouse button is released.
How to rotate the line
You tin can rotate the line around its center by clicking and dragging just outside i of the end points. Hold Shift to rotate the line in 15 caste increments:
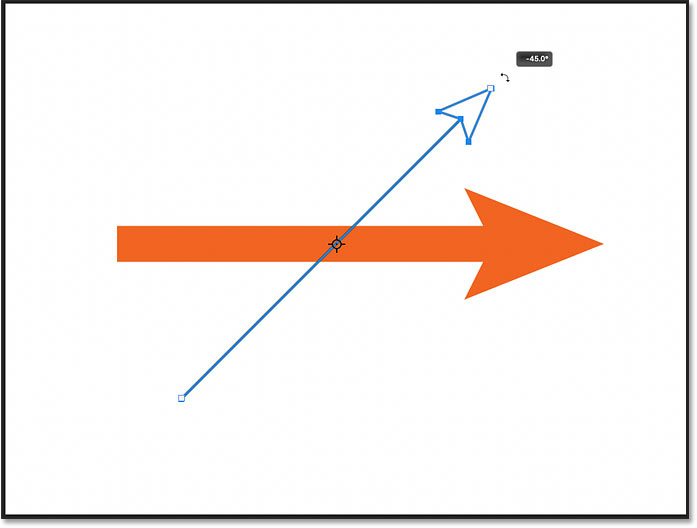
Rotating the line with the On-Canvass Controls.
To rotate the line from an end rather than from its center, click and drag the reference point (which, if you lot're not seeing it, we turned on before in Photoshop'due south Preferences) to one of the ends.
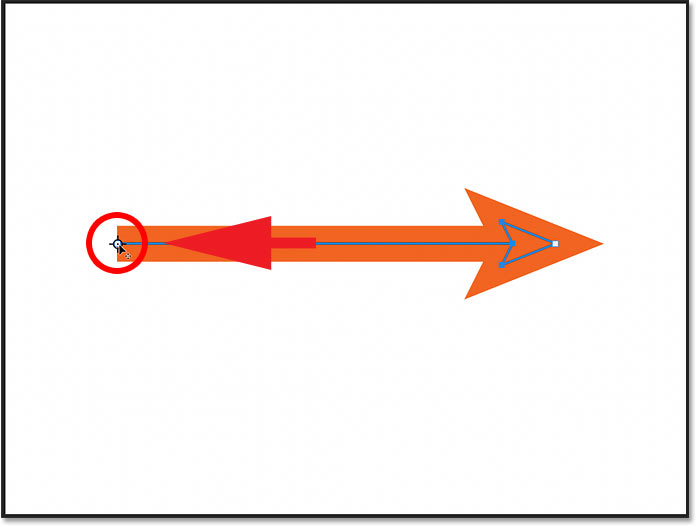
Dragging the reference indicate to the get-go of the line.
And then click and drag just outside the contrary stop to rotate it.
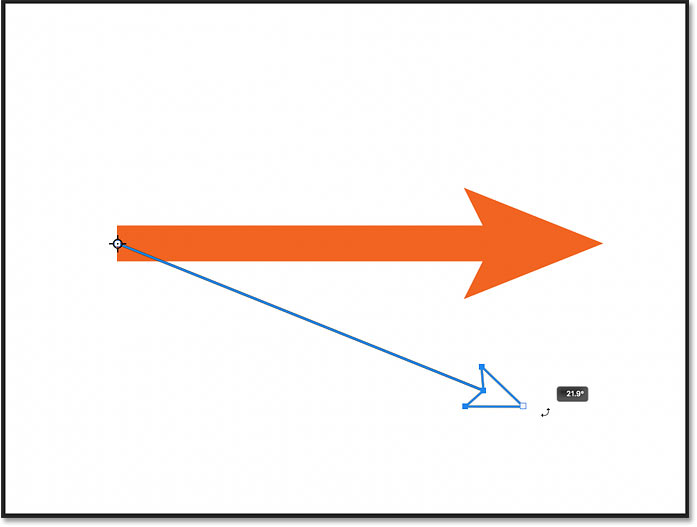
Rotating the line effectually the new rotation point.
The Live Shape properties
Finally, the Line Tool shares the aforementioned Live Shape backdrop in the Backdrop console as the other shape tools. At that place are no options for rounding the corners, only you lot tin can change the line's color or weight (using the Stroke options), adjust the rotation angle, flip the line vertically or horizontally, and more.
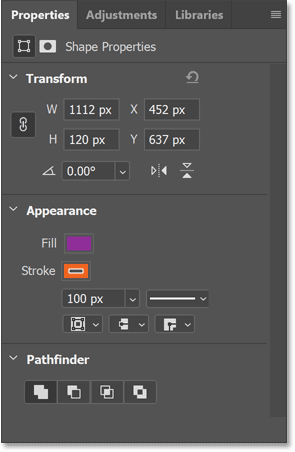
The options for the Line Tool in the Properties panel.
And there we have information technology! That's the basics of drawing shapes using the geometric shape tools in Photoshop! The one shape tool we didn't comprehend here is the Custom Shape Tool. But you can larn all about it in my Cartoon Custom Shapes in Photoshop tutorial
Check out more of my Photoshop Basics tutorials, and don't forget that all of my tutorials are now bachelor to download as PDFs!

How To Draw A Field In Adobe Photoshop,
Source: https://www.photoshopessentials.com/basics/how-to-draw-shapes-with-the-shape-tools/
Posted by: kimblenovence.blogspot.com
0 Response to "How To Draw A Field In Adobe Photoshop"
Post a Comment